Roll Call Pro — User Guide
Roll Call Pro is the scheduling layer for multi-location service businesses (smoke shops, cafés, salons — anywhere with hourly staff and more than one store). One owner runs the dashboard, every team member gets a personal mobile portal, and shifts get punched in via a QR code at each store.
This guide walks the whole product, end to end, with real screenshots from
the live app. URLs assume production (https://rollcallpro.net).
Quick links
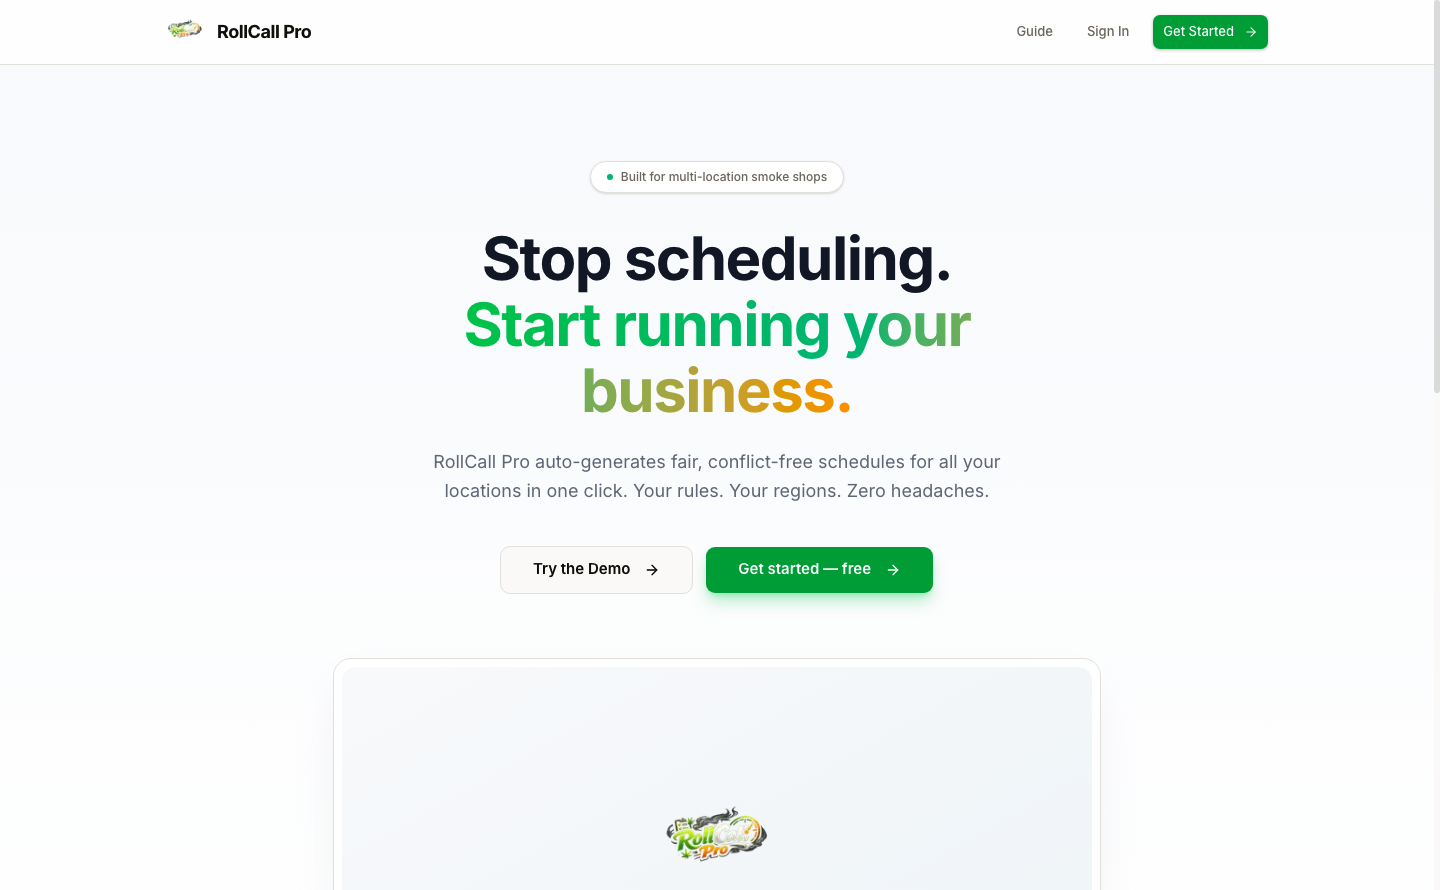
- Try the demo — /demo (no signup)
- Sign up — /signup
- Owner / manager dashboard — /dashboard
- Staff portal — /me/shifts (after accepting an invite)
Part 1 · Manager / owner
1. Sign up
URL: /signup
Five fields, one click. No card on file.
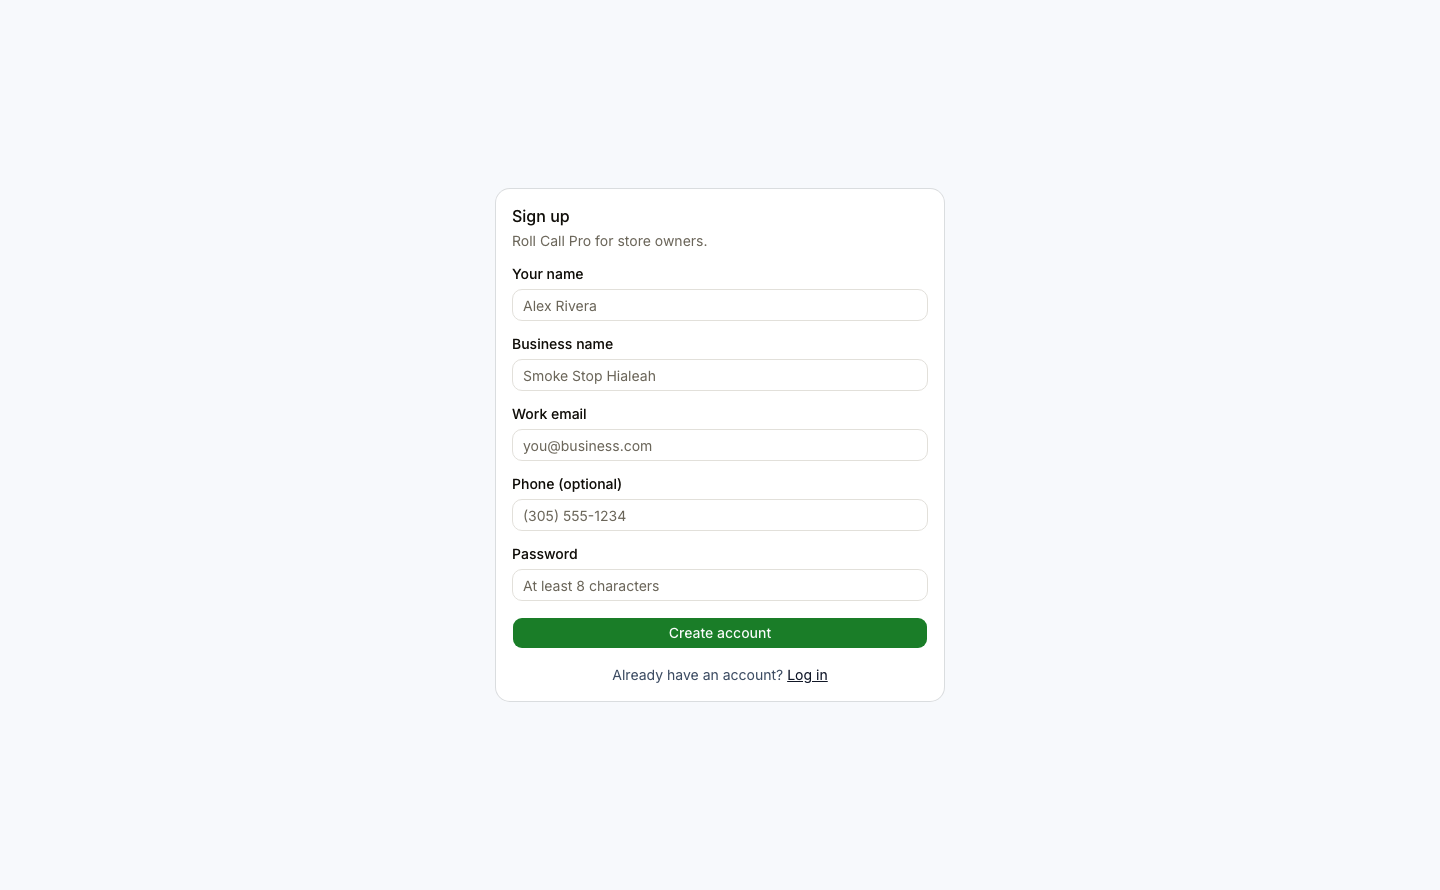
After Create account you land on /dashboard with zero stores, zero
employees, zero shifts. Everything below is the empty-org bootstrap path.
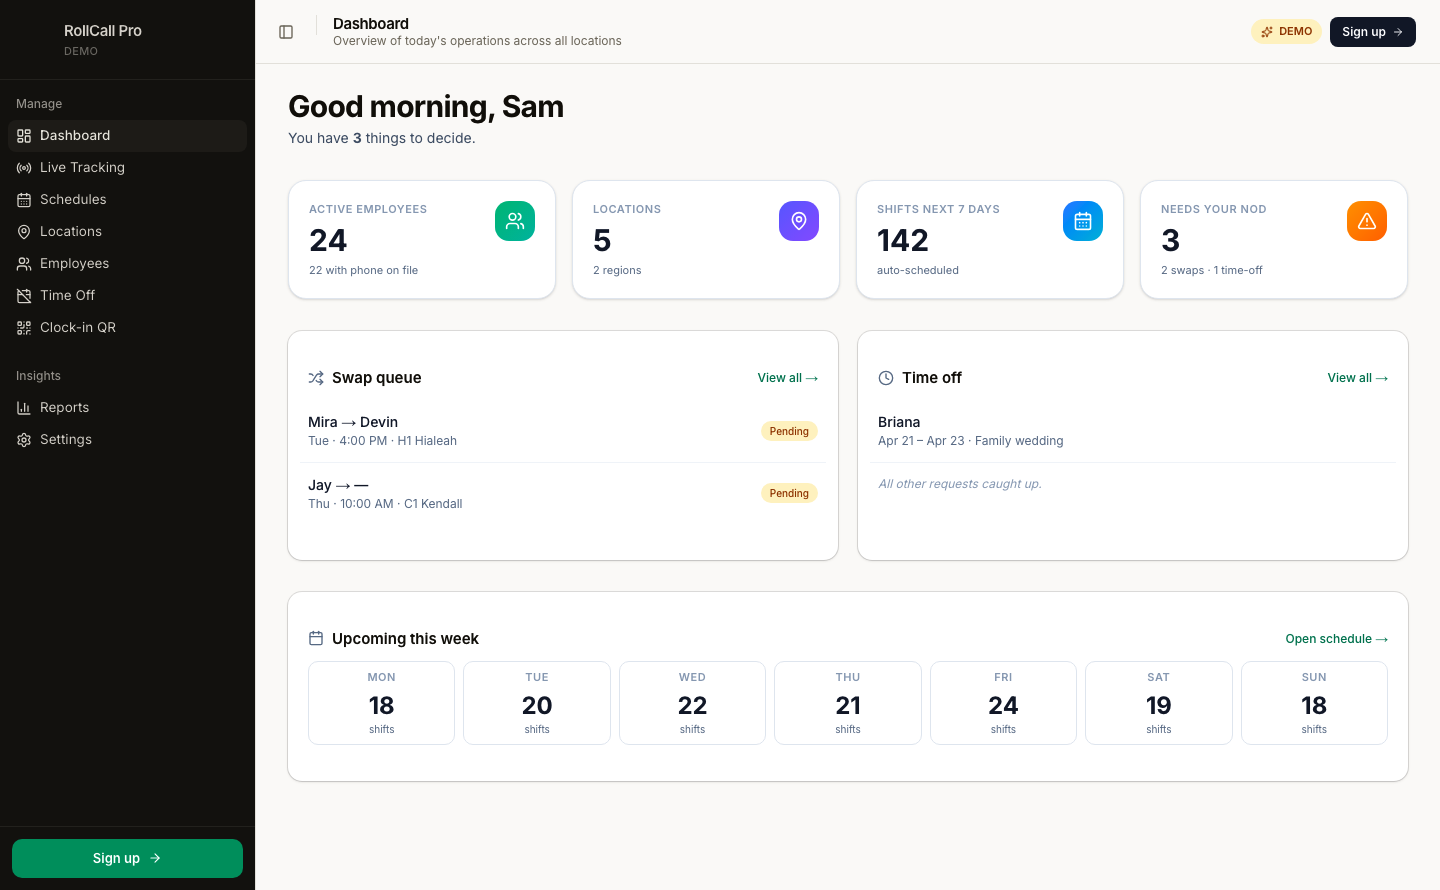
2. The dashboard
URL: /dashboard
This is what you see every morning. Live counts for employees, locations, upcoming shifts, plus a Needs your nod card with the things waiting on a decision.
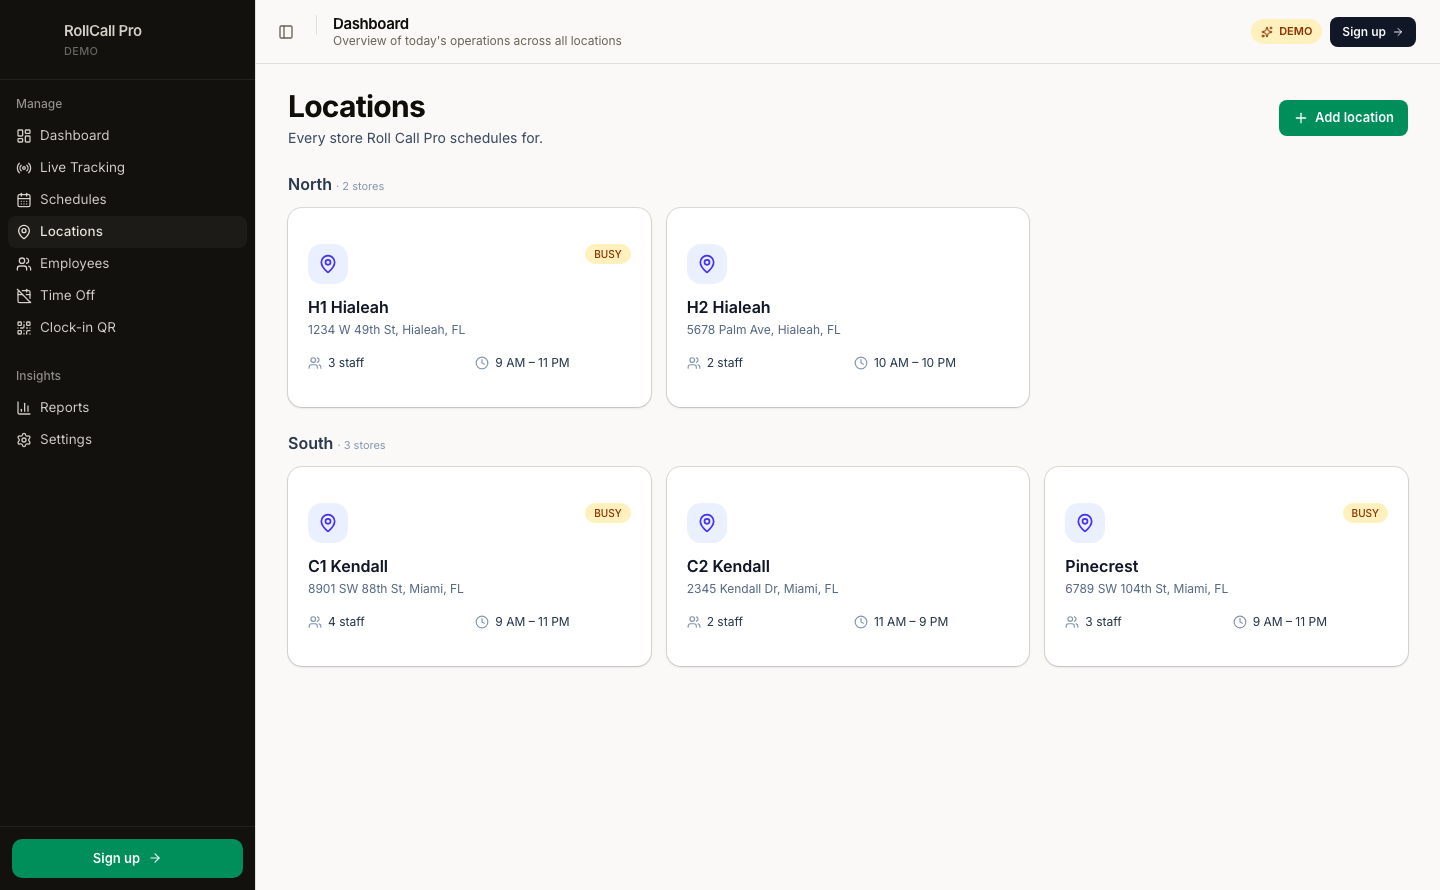
3. Add your first store
URL: /locations → Add location
Type into the Street address field — Google Places autocompletes as soon as you've typed three characters. Picking a result auto-fills the formatted address, latitude, and longitude.
Set opening + closing hours and the minimum closing-staff count, then
Add location. The store appears on /locations as a card and on
/live as a map pin.
4. Invite your team
URL: /employees → Send invite
Fill in their name, pick a role (Owner / Manager / Staff), optionally drop their phone for your own tracking, click Generate link. You'll get a copy-paste URL like:
https://rollcallpro.net/join/p4Kz9TmRx7QbVa…
Text it, email it, DM it. Pending links expire in 7 days.
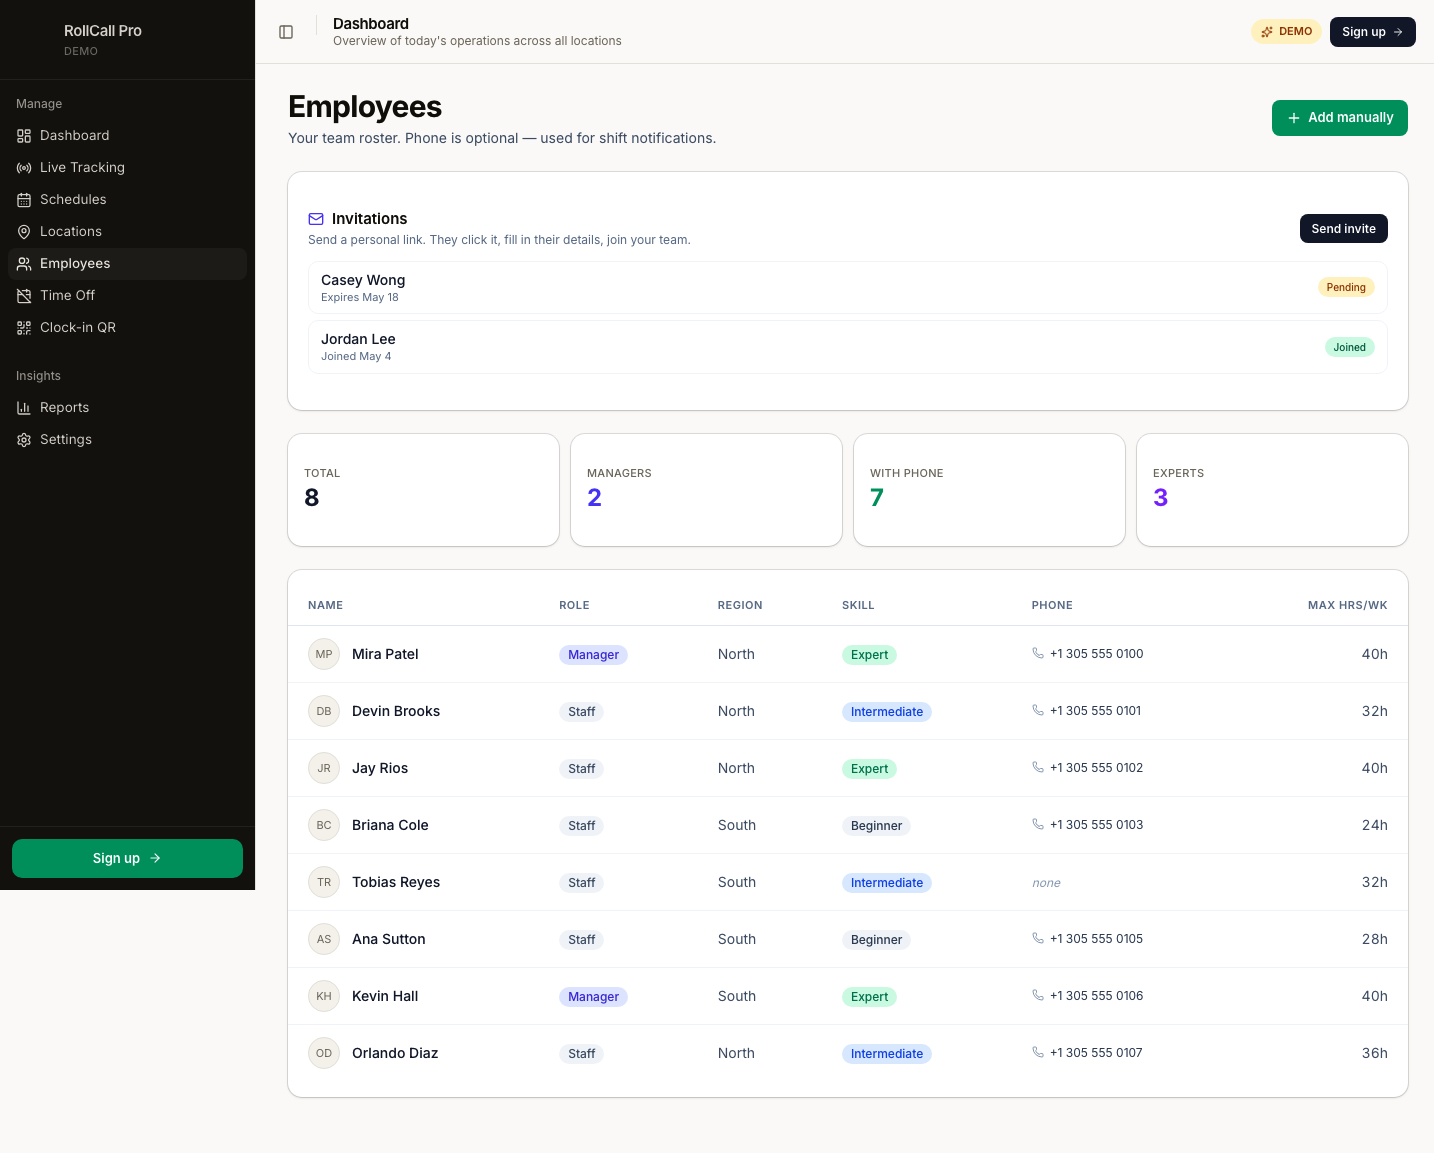
The Invitations card shows everyone's status with copy-link / revoke buttons.
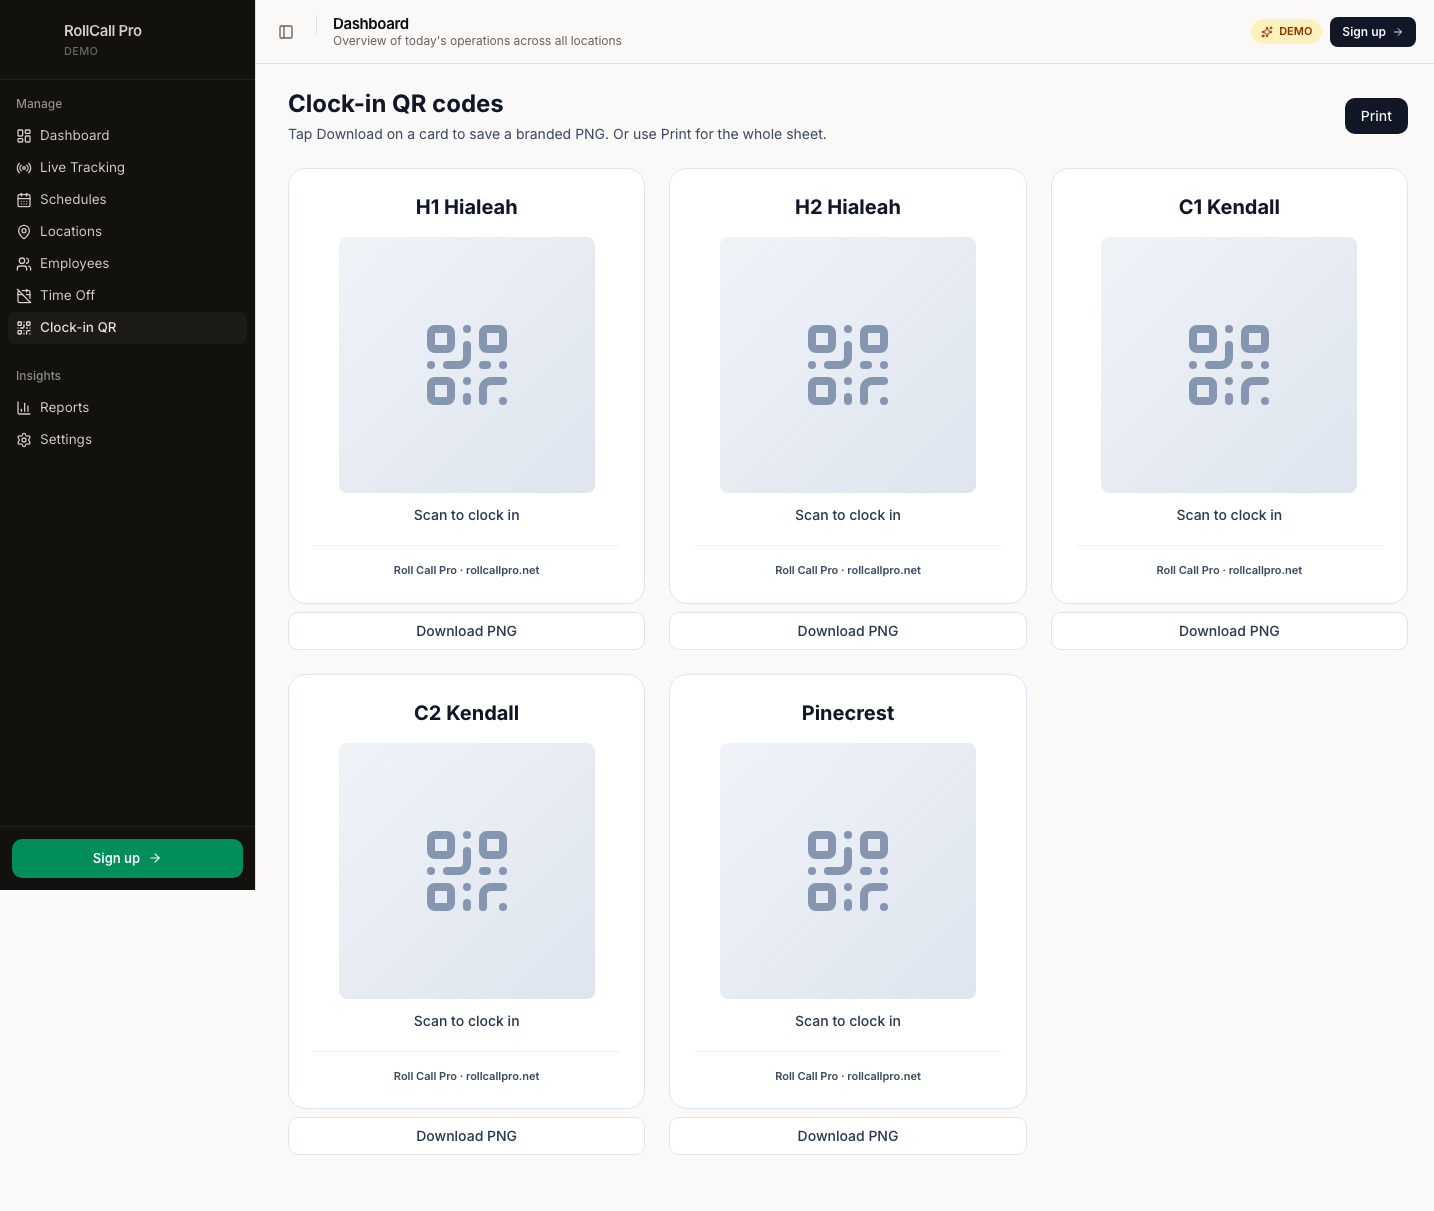
5. Set up the QR clock-in
URL: /clock-qr
Each active location gets its own card. Click Download PNG to save a branded image (Roll Call Pro logo baked into the bottom) — print it and tape it next to the punch station. Or hit Print at the top to send the whole sheet.
6. Generate a schedule
URL: /schedules → New Schedule
Pick a 2-week range, hit Generate. The scheduler respects every rule:
- Region lock (employees only assigned to stores in their region)
- 56-hour weekly cap
- 10-hour rest gap between shifts
- Expert closer required at "busy" stores on weekends
- Fair rotation across staff
You get a draft. Tweak any cell manually, then Publish — employees see
their assignments next time they open /me/shifts.
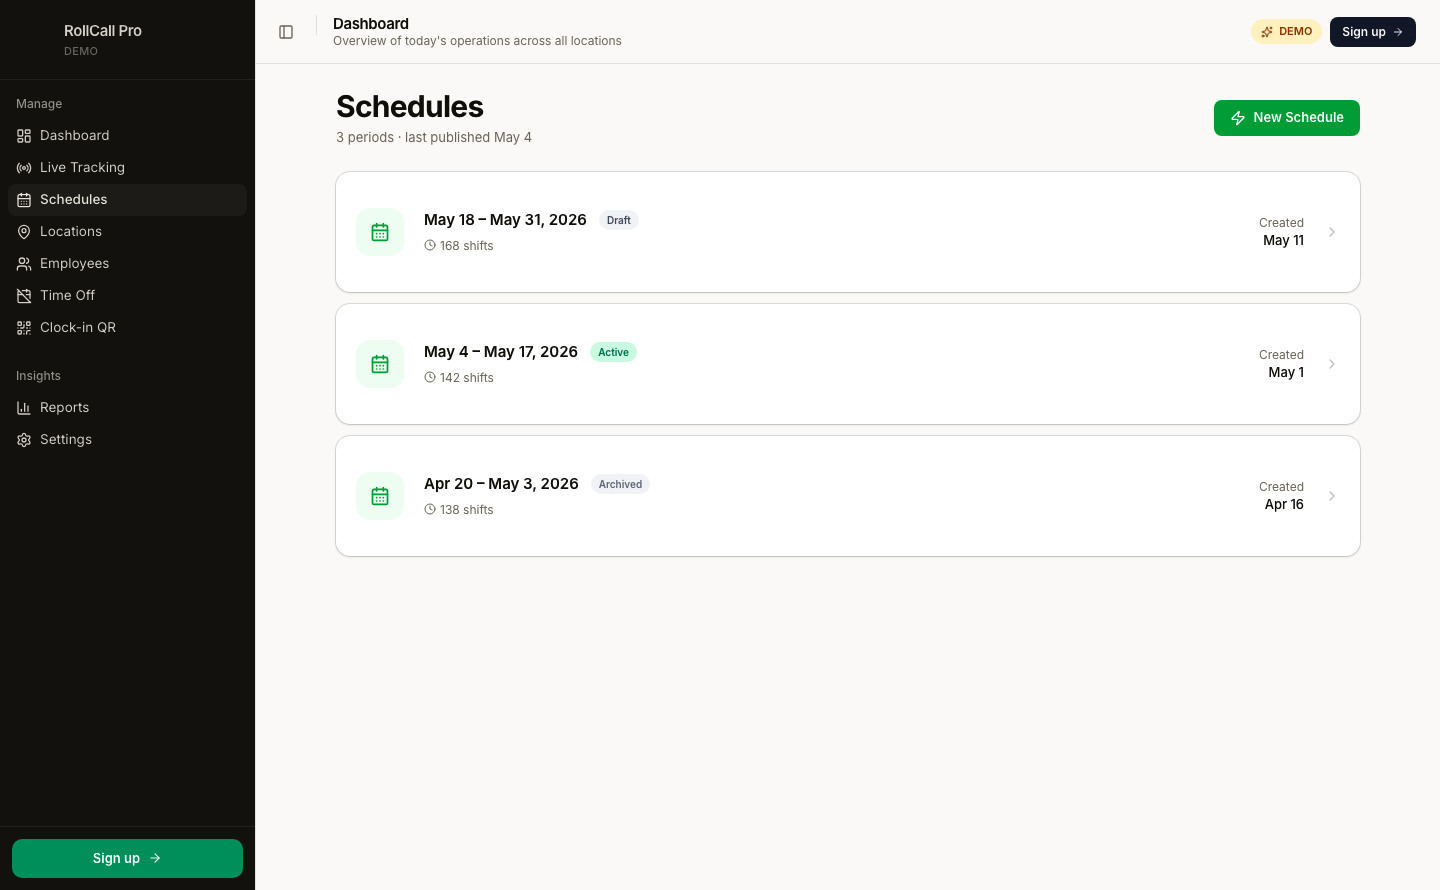
Each period has a trash icon to delete. Published schedules require a two-step confirm before they go (employees were already notified).
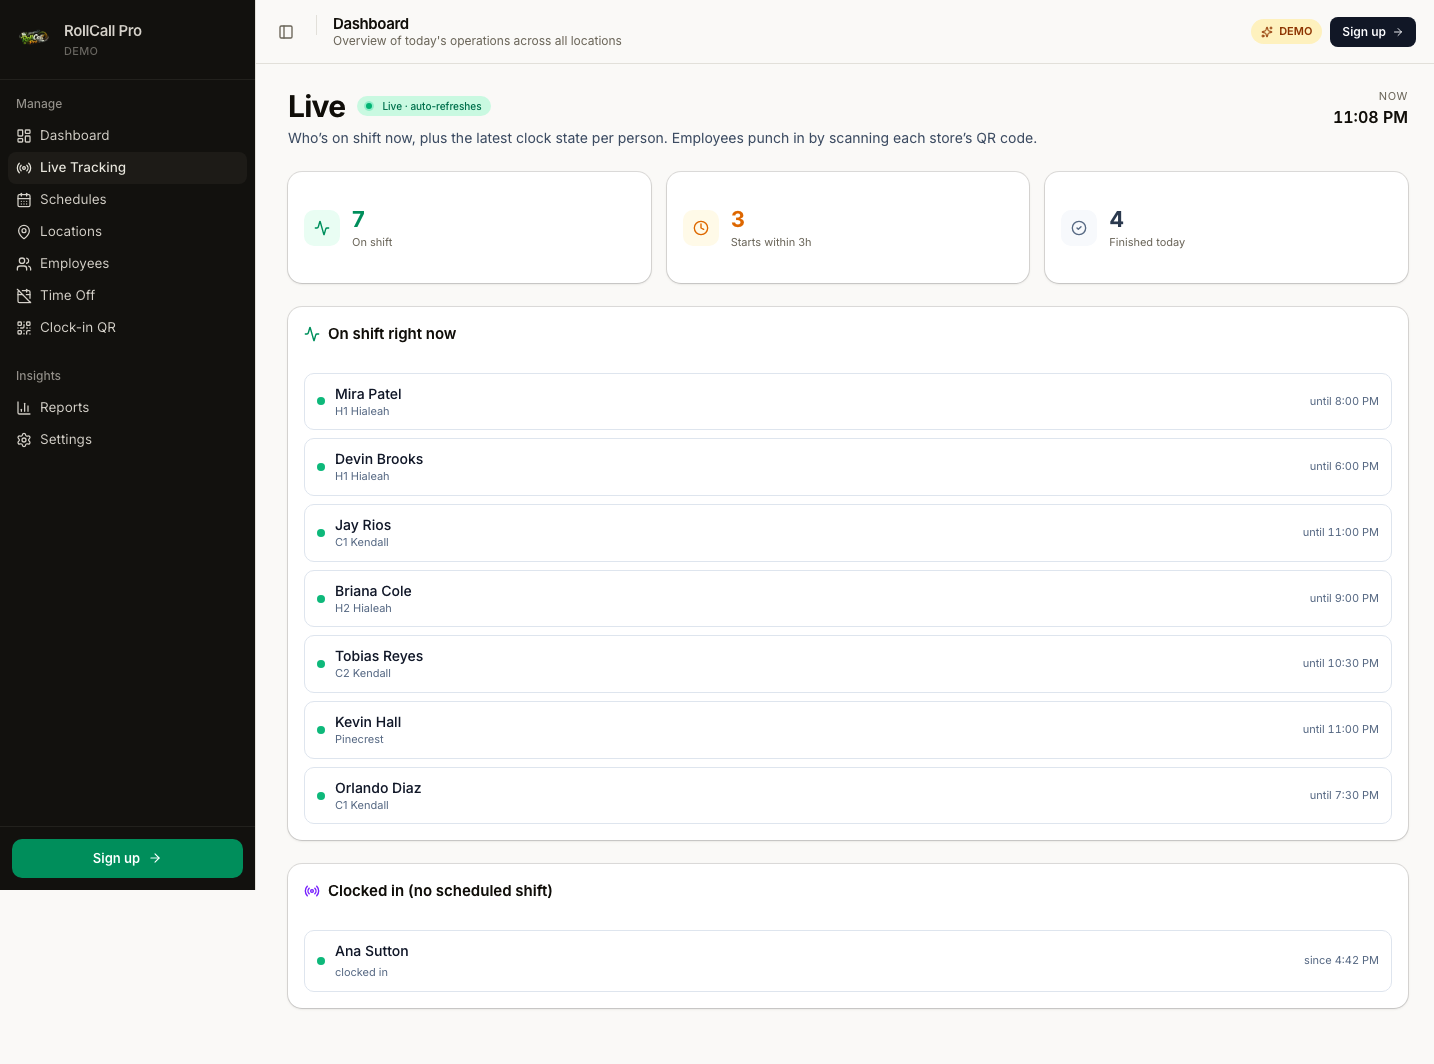
7. Live tracking
URL: /live
Auto-refreshes every 10 seconds. Shows who's currently clocked in, who finished today, and who's coming up in the next 3 hours. Off-schedule punches (someone clocked in without a scheduled shift) get their own panel so you can spot surprises.
8. Approve swap requests
When a staff member taps Request swap on a shift, it lands in your Swap queue on the dashboard. Tap into it to approve or deny — both sides get notified via the staff portal.
Approving a swap re-assigns the shift to whoever the requester named (or to "anyone available" if the request is open). The state machine prevents double-assignment to a single shift slot.
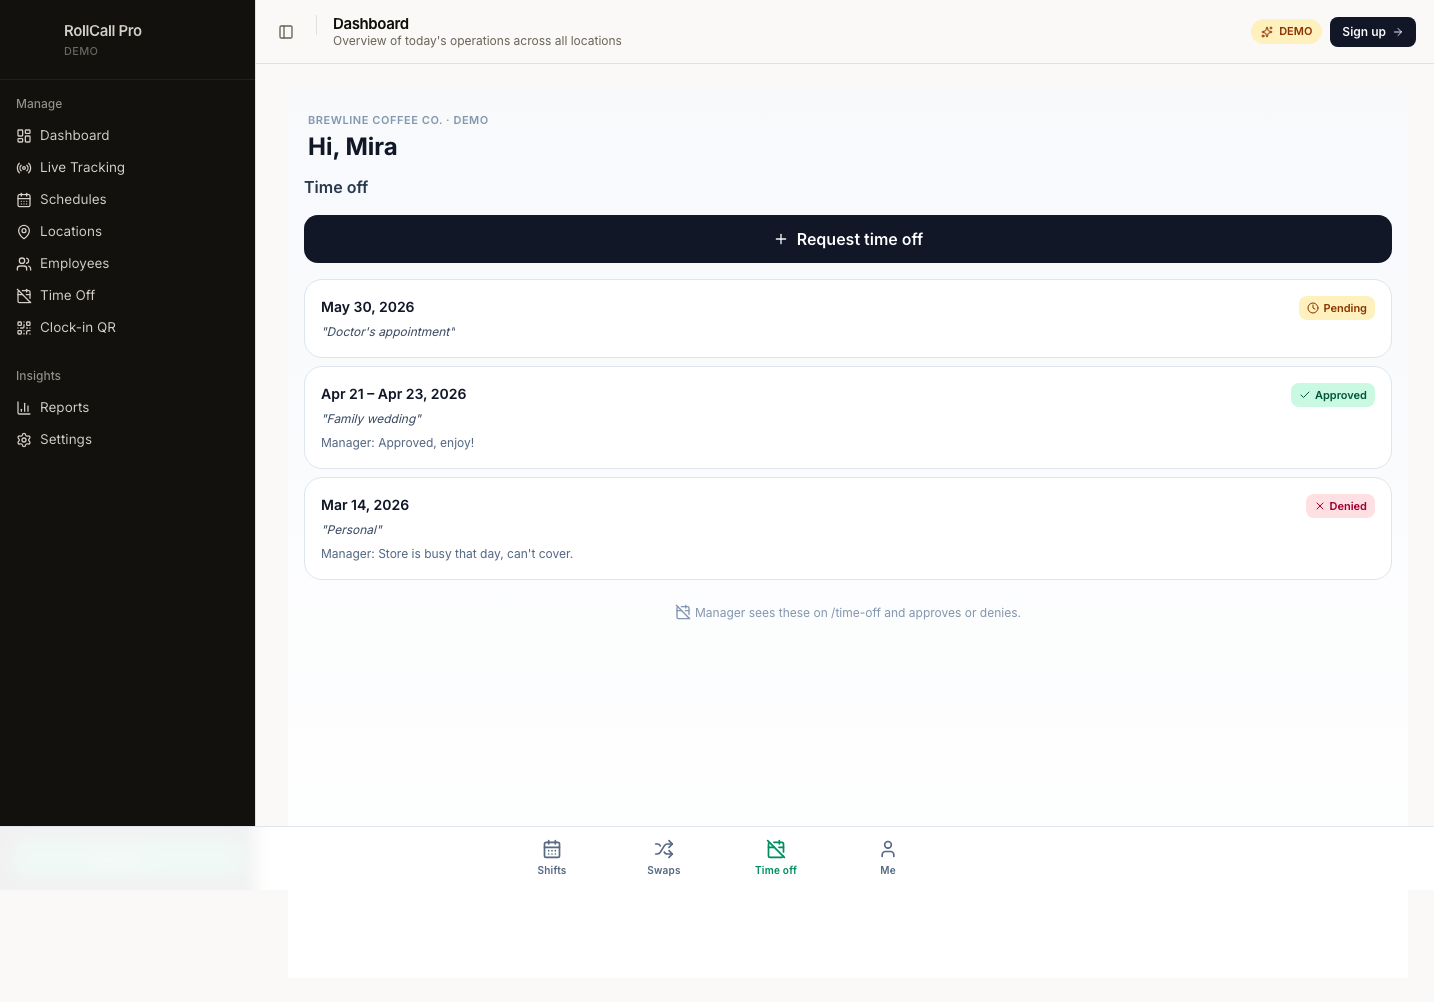
9. Approve time-off requests
URL: /time-off
Same pattern. The list shows pending, approved, and denied requests with
their date range and reason. Tap the green check or red X to decide; the
employee sees the decision (plus any notes you add) immediately on their
/me/time-off page.
10. Daily flow
- Open
/dashboard→ glance at Needs your nod count - Click into Swap queue → approve / deny each pending swap
- Click into Time off → same
- Glance at
/liveto make sure stores are staffed for opening - Bookmark
/schedulesfor next week's prep
5 minutes most days.
Part 2 · How employees clock in
The kiosk is mobile-first and lives at /clock/<storeSlug>. Employees
scan the printed QR with their phone camera and land here:
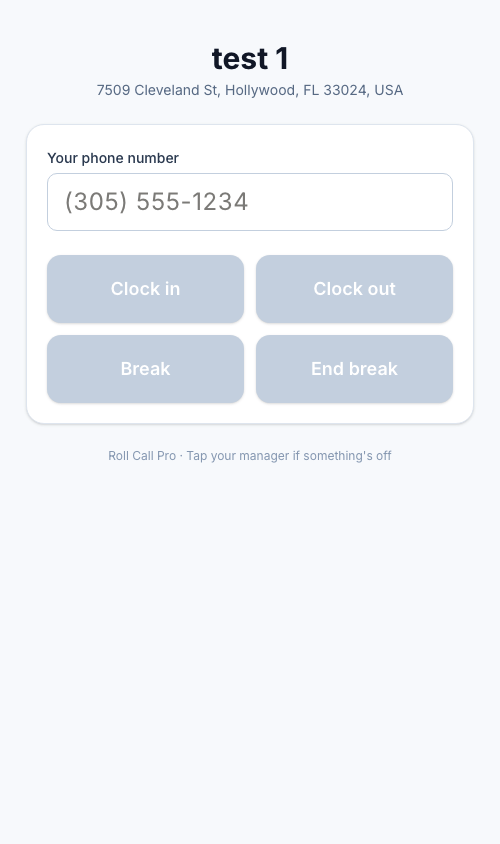
Flow:
- Employee scans the store's QR
- Enters phone (one-time per device — saved by the browser)
- Taps one of four buttons:
- Clock in — start of shift
- Clock out — end of shift
- Break — pause the clock
- End break — resume
- Green confirmation flashes for 4 seconds
- Kiosk auto-resets for the next person
First-time employees: if the phone isn't recognized, the kiosk reveals a register form right there — name + shift preference + weekend availability. Submit and the system creates the employee row, then auto-finishes the clock-in. No SMS, no manager involvement.
Built-in protections (enforced by a database trigger):
- Can't clock in twice in a row → "You're already clocked in."
- Can't clock out without clocking in → "Clock in before starting a break."
- Can't backdate a punch → "Time skew — try again."
- Can't end a break you didn't start → "You're not on a break."
Part 3 · Staff experience
When a new hire accepts the invite link, they land in the staff portal —
a mobile-first dashboard at /me/* with four tabs at the bottom.
Joining
URL: /join/<token> (the link the manager sent)
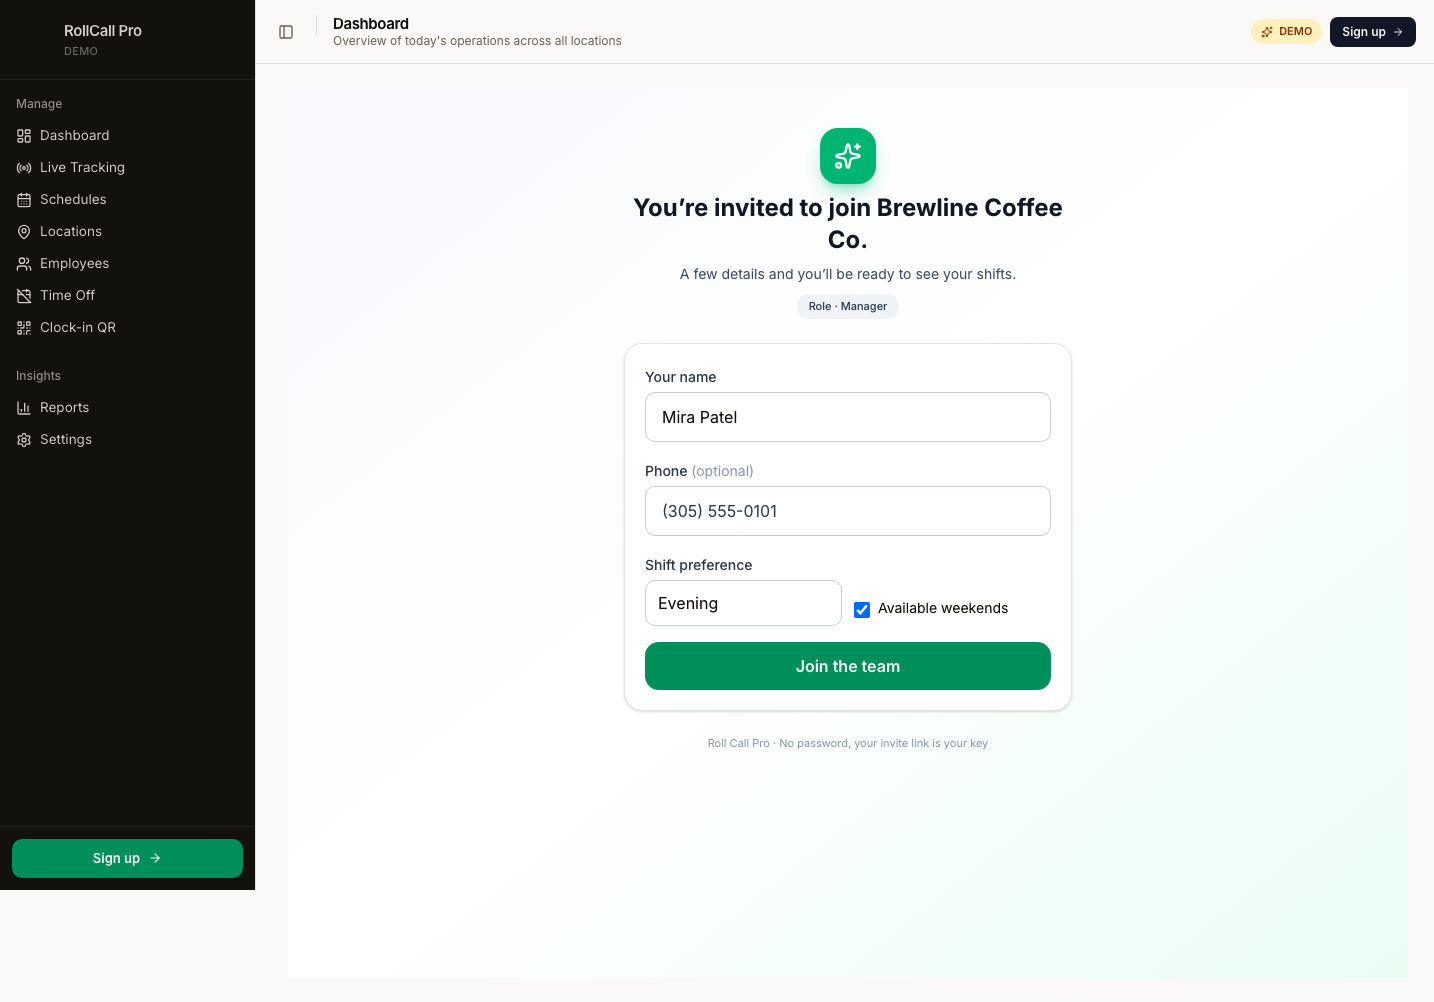
Their name is pre-filled from what the manager typed. They confirm, optionally add a phone, pick shift preference + weekend availability, tap Join the team. A long-lived cookie gets set and they bounce straight to their shifts.
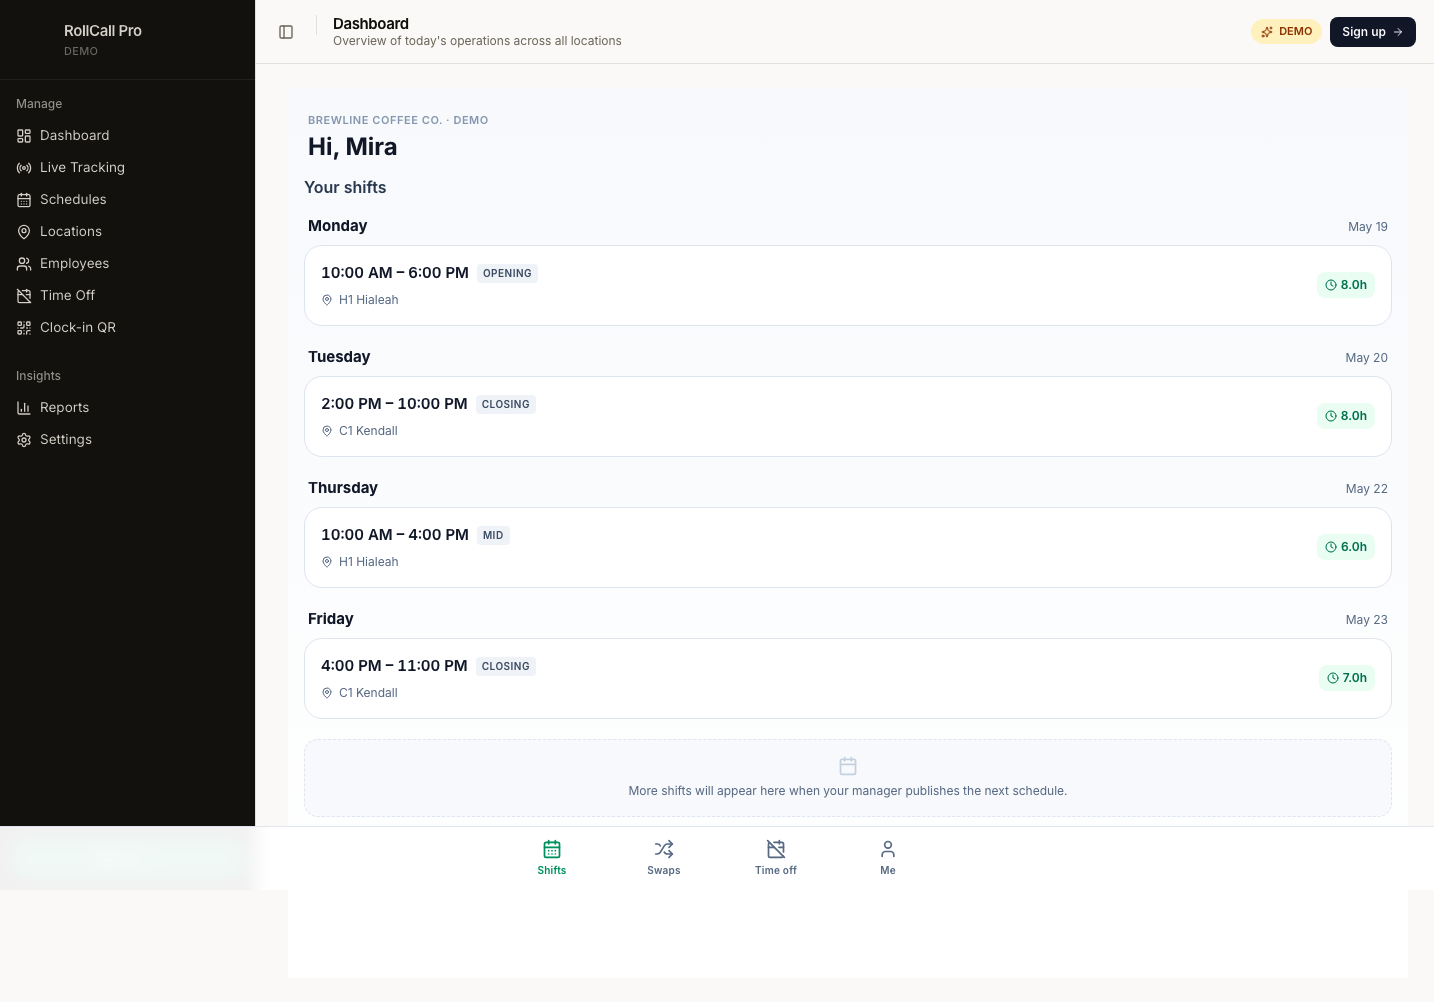
My shifts
URL: /me/shifts
Upcoming shifts grouped by day. Tap any shift card for the detail view.
Shift detail + Request swap
Tapping a shift opens the full detail with date, time, location, and a big Request swap button.

When they tap Request swap:
- A reason textarea appears (optional — "doctor's appointment", etc.)
- Send request posts to
/api/me/swaps - Manager sees it in their Swap queue on the dashboard
- The shift's row stays visible to the staff member with a "Pending" badge until the manager decides
My swap requests
URL: /me/swaps
Outgoing history. Each row shows the shift, the staff member's reason, and the manager's decision (or "Pending" while waiting).
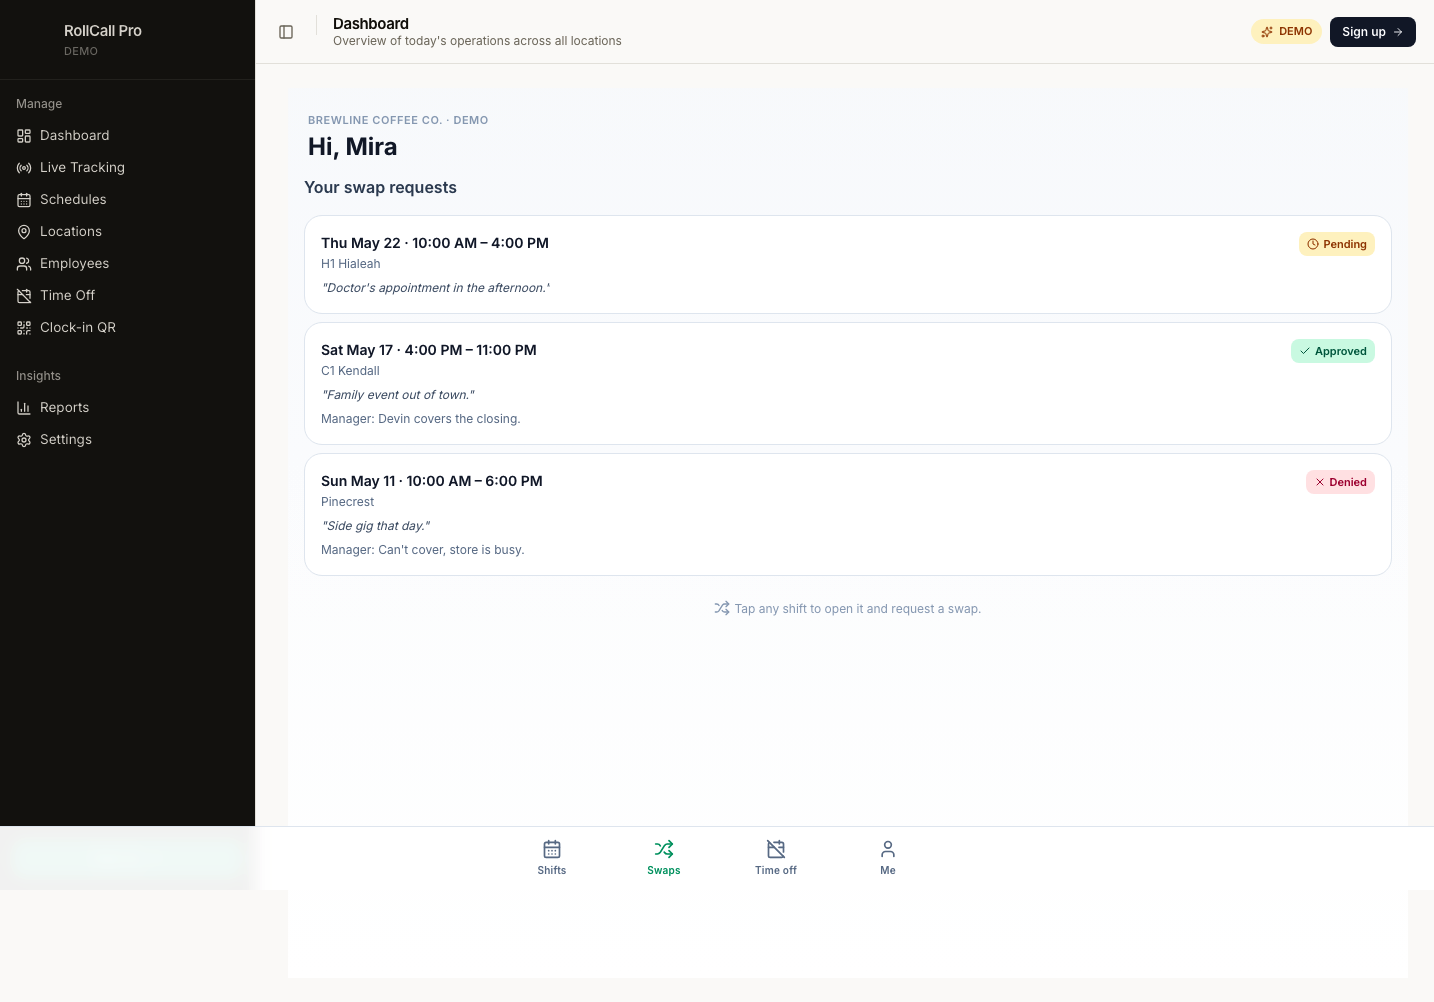
Status badges:
- Pending (amber) — manager hasn't decided yet
- Approved (green) — shift is now covered by someone else
- Denied (red) — staff member still owns the shift
Time off
URL: /me/time-off
List of past + pending requests at the top, Request time off button that opens an inline form (start date, end date, optional reason).
Manager sees fresh requests on /time-off and approves/denies. Decision
- any manager note shows up here within seconds.
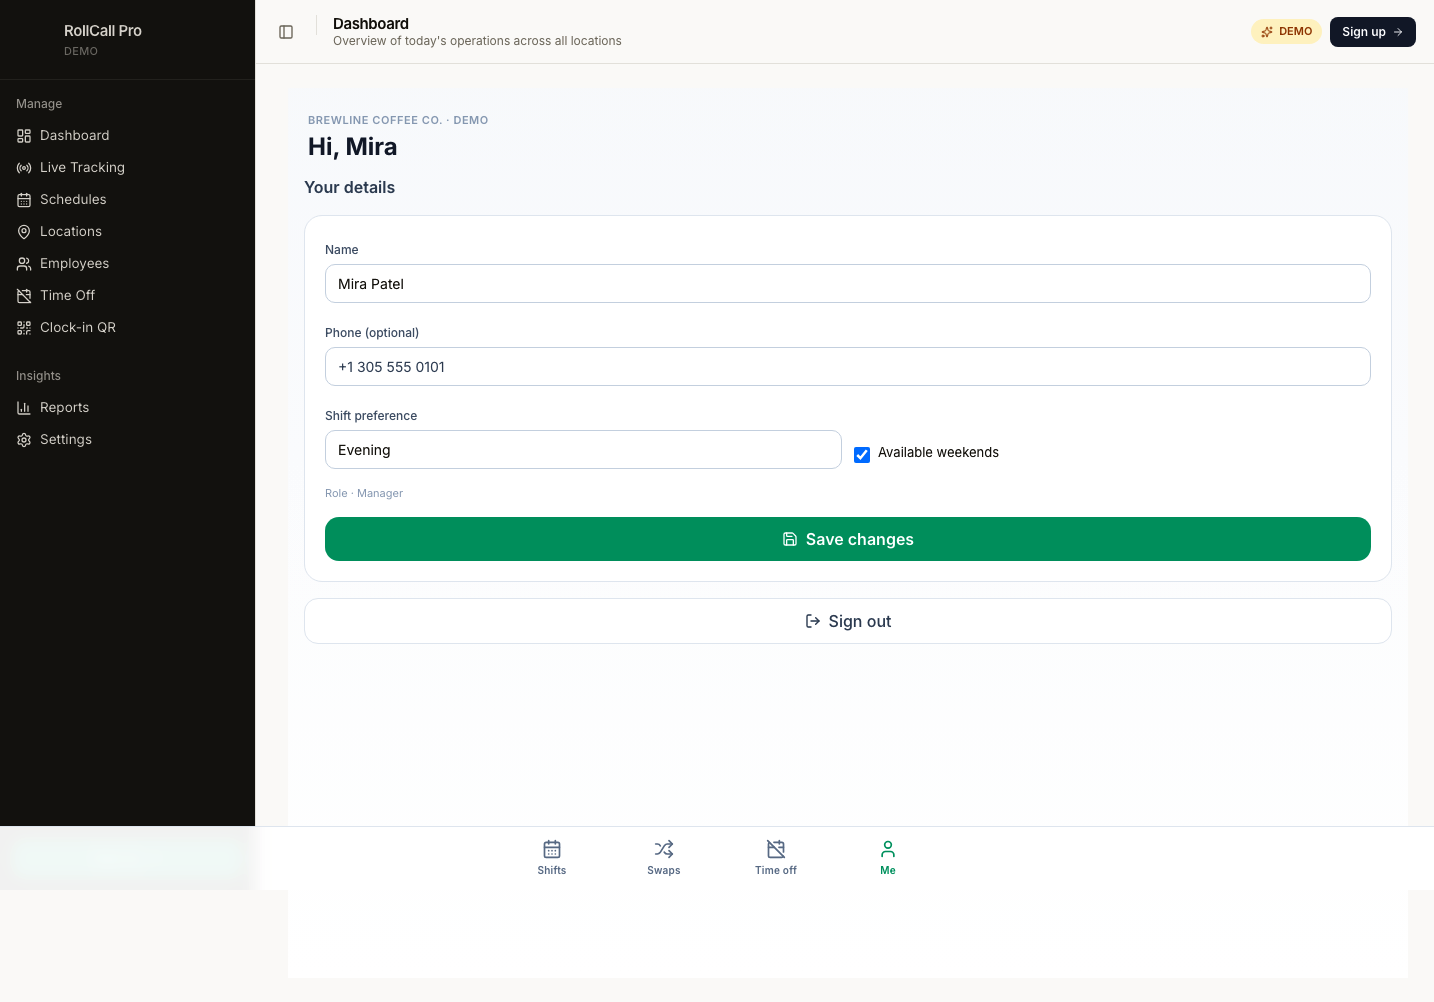
Profile
URL: /me/profile
Edit name, phone, shift preference, weekend availability. The role badge
at the bottom is read-only — only an owner / manager can change a staff
member's role on /employees.
Sign out revokes the staff token + clears the cookie so the device can't be re-used. To get back in, the staff member asks their manager for a new invite link.
Part 4 · Roles
| Role | Can do |
|---|---|
| Owner | Everything. Exactly one per organization. |
| Manager | Approve swaps + time off, edit roster, generate schedules, send invites. |
| Staff | See own shifts, request swaps + time off via /me/*. |
Owners and Managers log into the main dashboard. Staff don't get
dashboard access — their entire experience is /me/*.
Part 5 · The QR-only path (no schedule yet)
If you're just starting out and haven't built a schedule:
- Sign up
- Add one location with address
- Print that location's QR
- Tape it at the store
- Employees scan, register themselves via the kiosk
Everyone shows up on /live under Clocked in (no scheduled shift).
Add formal scheduling whenever you're ready.
Part 6 · Troubleshooting
Map is blank on /locations or /live.
The NEXT_PUBLIC_GOOGLE_MAPS_API_KEY isn't loaded or the key doesn't have
Maps JavaScript API enabled. Open DevTools → Console — Google prints a
specific error name (RefererNotAllowedMapError, ApiNotActivatedMapError).
Invite link says "expired".
Generate a fresh one from /employees → Send invite.
Employee can't log into /me. Their staff cookie expired or got cleared. Send them a new invite — accepting it issues a fresh 180-day cookie.
QR scan opens the kiosk but punch fails.
- Phone number doesn't match any employee → use the Register flow shown right under the error message.
- Already clocked in → the DB trigger rejects double punches with a friendly message ("You're already clocked in").
I want to delete a store / schedule / employee. Stores: open the location → Delete (left side of the modal footer). Schedules: trash icon on the list. Employees: open their row → flip Active to off (preserves historical shifts).
Part 7 · URL map
| Path | Who |
|---|---|
/ | Public (marketing) |
/demo | Public preview |
/guide | Public (this page) |
/signup, /login | Public |
/dashboard | Owner / Manager |
/employees | Owner / Manager |
/locations | Owner / Manager |
/schedules | Owner / Manager |
/live | Owner / Manager |
/clock-qr | Owner / Manager |
/time-off | Owner / Manager |
/reports | Owner / Manager |
/settings | Owner / Manager |
/join/<token> | Invited recipient |
/clock/<storeSlug> | Anyone at the store |
/me/shifts | Staff |
/me/shifts/<id> | Staff (shift detail) |
/me/swaps | Staff |
/me/time-off | Staff |
/me/profile | Staff |
Brewline Coffee Co. is loaded as a sample org. Every nav item is wired
so you can poke around — clicking any action button funnels you to
/signup. The staff portal demo lives at
/demo/me/shifts.